Picture Book Month :: The Dot

Peter Reynolds simply addresses art and self confidence. Vashti feels that she cannot draw. Her teacher encourages her to just make a mark and so Vashti does. What happens next is wonderful! Perfect read for the artist who needs a little confidence boost when it comes to who they are as an artist. All art classes should be read this book as well as Peter Reynolds book, Ish, on the first day of class. All ages.


xo, jen
{images via goodreads}

Picture Book Month :: Emma Kate

Emma Kate by Patricia Polacco is a wonderful book about a little girl and an elephant. They're best friends that do everything together. It's a perfect story for an imagination/ imaginary friends themed lesson, storytime, discussion, or just pure enjoyment. Also, there's a little twist at the end which makes the book stellar. This book is great for preschoolers and up.
xo, jen
{image via goodreads}


November is Picture Book Month

Happy November and Picture Book Month! Yep, picture book month. How exciting! For those of you that may not know this already, I love picture books. In college one of my professors read the Velveteen Rabbit by Margery Williams to our class. I had never heard a book read the way he read that day. He made the story come alive and made me remember all the wonderful books I read as a child. I was hooked all over again.
Picture books are my favorite and since it is Picture Book Month, I would like to share some of my favorite picture books throughout the month. So without further ado, here is one of my all time favorites. Seriously, you can't go wrong with this one. The reader has the power to have the kids laughing and to make this a story they'll ask for again and again.

no.1  Bark, George by Jules Feiffer

Happy Reading! xo, jen

Calligraphy Workshop

Calligraphy is such a beautiful and timeless art. This past weekend a couple of friends and I took a lovely calligraphy workshop with Jenna Rainey. It was a lot of fun, but hard work. Trying to learn how to hold (not "claw") the pen took a lot of concentration on my part. Also, trying to write with your whole arm and not just your wrist was a bit challenging. We all left with a calligraphy kit and I've been practicing everyday since...I'm getting better than the picture of my first try.  It's truly like therapy. Have you ever taken calligraphy classes? If you're in the area, Oh, Hello Friend has been hosting some fabulous workshops.

xo, jen

Made :: Baked Doughnuts

I can't believe I forgot about this post. A while back I really, really wanted to bake doughnuts and went out and bought a doughnut pan. It sat in my cabinet for months. Finally I saw a recipe in Saveur magazine and decided to give it a go. The only changes made were the addition of green tea matcha and blueberries. The results were really good the day of, but after that, not so much. I mean they're okay the next day, but just okay. Fresh is best! This is making me want to do some baking...like right now. hmmm. Anyway have a great weekend. xo, jen


What's the Time?


Time for a quick and easy DIY. When we moved into our place, it came with one of those not so cute plastic clocks. Believe it or not, we lived with it for 3 years...dead battery and all. I'm not proud, but it's the truth. For some strange reason after three years, I felt the need to do something about the clock. First thought, ask the landlord if she wanted it back, but she was out of town. Second thought, clean it, and try to jazz it up a bit. So I pulled out my case of washi tape and went to town. Here's the result. It's kinda cute. You too can do this and here's how:

  1. if your clock is old and grimy like this one, clean and dry it first
  2. then decide a color scheme. initially i was going to do an ombre effect with the yellows, but because the kitchen is so outdated, this yellow clock would have dated it even more so I added blue washi tape.
  3. cut small strips of washi tape and line it up to the face and wrap it around the edge to the back
  4. keep repeating step 3 until you've wrapped the whole clock.
  5.  and you're done. hang it up and call it cute!

The tapes I used are from Target. I can't remember the brand, but they are not my faves. Some of the tape wasn't sticking well at first so I  had to make sure to press it down firmly. Maybe a light sanding would help the tape grip a little better?

xo, jen

Hawaii Part One

Thought I'd just share some random pictures from our Hawaiian vacation. Have a great weekend.

a couple of pics taken at the North Shore.
 a visit to the Dole Plantation
Hawaii is the rainbow state

pretty flowers and trees

xo, jen

And We're Back!


We're back from our trip to Hawaii. This trip was not on our radar this year, but when a friend asked me to be a part of her wedding in Hawaii, we decided to make it into a vacation as well. My husband finally got to see where I spent most of my teen years. We also got a chance to do some hiking in the forest and hike Diamond Head as well as lounge at the pool and frolic in the ocean. I'll get some pictures posted next week. Our time went fast and now we're getting back into the swing of real life. Looking forward to being here again!
xo, jen

Loving Vera

photo:: Skinny laMinx 
Soon after we moved to California, I scored a set of 7 vintage Vera napkins for like $3. The design is old school and fabulous. Then maybe a year or so ago Macy's had a Vera bathroom collection and I bought a fab shower curtain and toothbrush holder. finally used them this summer and they really brighten the bathroom. And finally a few weeks ago at an antique market, I found another Vera napkin. It doesn't match the ones I already have (i think it's new, not vintage), but I love the design and it's in great condition. I adore Vera! Have a great weekend.


xo, jen
Vera Neumann was a designer well known for her both bold and cheerful patterns, largely on scarves. Her company partners with many brands today so that her beautiful work can still be enjoyed as a part of everyday living. Currently Crate and Barrel has a new collection of Vera products.

Made :: Salted Vanilla Bean Chocolate Chip Cookies

Lately it's been hot here in Southern California and I try not to complain too much, but MAN IT IS HOT! i complain because we DO NOT have air conditioning in our house. That being said, there's not a whole lot of cooking going on since we don't what to make the house hotter.
Unfortunately I really, really wanted to bake cookies. After much much consideration, I went for it. The  dough was made one day and I baked them early in the morning the following two days. And you know what, the cookies were so good that I didn't complain and my husband didn't complain about the house being hot. If you love that buttery salty sweet taste, you've got to make these cookies. The recipe used is a slight adaptation from David Lebovitz.


Notes: The vanilla bean sea salt you can make yourself, with vanilla bean and sea salt or buy. I used Hepps, picked it up at the Farmer's Market for $5. My oven is super old and baking times usually take about twice as long as the recommended baking time. The recommended baking time for this recipe is 10 minutes.

Salted Vanilla Bean Chocolate Chip Cookies
----------------------------------------------------------

4 ounces of butter, softened
2/3 cup light brown sugar
1/2 cup sugar
1 egg
1/2 tsp vanilla extract
1 1/3 cup flour
1/2 tsp baking soda
1/2 tsp kosher salt
3/4 cup chocolate chips
1/2 cup almonds, chopped
vanilla bean sea salt, for finishing

Mix butter, brown sugar, and sugar until creamy. Add egg and vanilla extract. In a separate bowl, mix by hand, flour, baking soda, and kosher salt. Slowly stir in flour mixture in with the creamy mixture until combined. Add chocolate chips and almonds. Cover and chill for 24 hours.
To Bake: preheat oven 350 degrees and then bake. Halfway(or whenever cookies are somewhat set ) through the baking, sprinkle with the vanilla bean sea salt. Continue baking. Remove from oven and cool. Enjoy.
xo, jen

And the Weekend Starts Now


Go ahead, it's okay. Start your weekend a little early. Get up and dance! Happy Holiday Weekend! 
 vevo video via YouTube
xo, jen
p.s. this song is so fun! love it!

How to Boil an Egg!

I know that it may sound silly, but not everyone can boil eggs. Last fall I took a basic cooking class and one of the things we made were boiled eggs. After the class I was excited because I thought I learned the secret to perfectly boiled eggs and shared this with my husband. He totally disagreed with what I was taught and continued to boil his eggs for 15 minutes. That's right 15 long minutes. Well, a couple of weeks ago I decided to boil the eggs the way I was taught without telling my husband. First he was impressed with how easy they were to peel and then he loved how great the eggs tasted. no greenish yellow overcooked yolks, just soft and bright orange yellow. He is now a convert and boils eggs perfectly. Here's what we do:
  1. Bring a pot of water to a boil
  2. Place eggs in one by one
  3. Set a timer for 7 minutes
  4. Turn off the heat, remove eggs from the pot, and place in an ice bath
  5. Allow eggs to cool completely, peel, and enjoy


Easy peasy. Give it a try. How do you boil your eggs?
xo, jen
note: once you boil eggs you should probably consume them within a couple of hours. if not, they can be refrigerated for about a week.

Yay, It's Friday!

Hooray it's Friday! Do you have plans yet? If you're in the South Bay Beach Cities area, here's a few happenings going on over this weekend. Whatever you do, I hope you have a great weekend.

Redondo Beach
Torrance
Wilson Park Farmer's Market-this market is one of my faves!
Hermosa Beach

xo, jen 

Oops...Made You Cute!

A while ago I picked up 4 chairs at my local Goodwill store. Plain, inexpensive, and perfect for our outdoor gatherings. The plan was to paint them, but I just never got around to it. So a couple of months ago, while at Home Depot, I came across some fabulous colors of "Oops" paint. Oops paint are containers of paint that were a "mess up" color or maybe someone changed their mind about wanting the paint. Home Depot then sells those containers of paint at a reduced price. The "oops" colors that I liked were the small "try me" containers and were only .50¢ a pop. score. Needless to say I bought all of them and FINALLY got around to painting those chairs.
  • First they were wiped down, lightly sanded, and wiped clean again.
  • Then I painted them with a flat paint brush giving them two coats. Since the paint was flat, the drying time between coats was quick. Although I used a flat paint brush, a foam roller brush probably would've been a better choice.
  •  That's it! I didn't put any type of clear varnish on top, but since the paint is flat I will before the chairs are used again.
They're so cute! Our guests loved them and so do I. Have you painted anything lately?


xo, jen

Made :: Panna Cotta

Happy Friday everybody! Here's a light, slightly tangy, sweet, but not too sweet Italian treat for you to try this weekend or in the future.

Vanilla Bean Panna Cotta
--------------------------------------------------------------------------------------------
--------------------------------------------------------------------------------------------
1 1/4c  heavy cream
7tbsp   sugar
1/2 vanilla bean (seeds will be scraped)
1 1/2tsp gelatin
1 3/4 c  buttermilk
Mix 1 1/2tsp of gelatin and 1tbsp of cold water. set aside and allow gelatin form. Heat sugar, heavy cream, and the scraped vanilla bean seeds (along with the bean pod)  in a saucepan. medium heat and long enough so that the sugar dissolves in the cream. pour the hot mixture into the bowl with the gelatin. next pour in the buttermilk and mix. strain the mixture into another bowl. Divide the custard into small ramekins or jars. refrigerate for at least 4 hours. Enjoy with a topping. * i thought i would enjoy this even more with a fruit compote, but actually i enjoyed it more plain.
This was my first time making and tasting panna cotta and I'm in love with it. It's so simple and has a light decadence to it. The possible variations to this dessert are endless.
Have a great weekend!
xo, jen 
  

Currently Reading

Have you been to your local library lately? I may be a little biased, but libraries...well, there's not much better than a library. Typically, I'm all about checking out non-fiction material. This year though, I decided I needed to add some adult fiction to my life. I haven't read as much as I planned for myself, but I am still reading it. Currently on my nightstand are these two library gems (one fiction & one non-fiction.) What are you currently reading?

xo, jen

Check It :: Apartment Therapy's Style Cure

Feeling like you're ready to make some changes with your home decor, but don't know how to start or maybe it's a little overwhelming to think about? Well, Apartment Therapy is hosting a Style Cure. Over the course of a month (August), you will be given small tasks, encouragement, and inspiration each day. What's cool about this is that you really get a chance to develop your style in a step by step process. Taking a little bit each day makes it fun and exciting. You also get to be part of a community that shares and learns from each other. I signed up today since we've been looking to make some changes in our home, but are little unsure as to what room we want to tackle first and the style direction we want to take the room. Check the site out and if it sounds good to you, sign up!

xo, jen 

Made :: Creme Fraiche Ice Cream

Words cannot describe how simple and yummy the Creme Fraiche Ice Cream turned out! First though, who knew how easy it would be to make homemade Creme Fraiche? Only two ingredients needed, mix them together, and let it set overnight. That's really it! amazing.


The ice cream was equally simple. I've never made ice cream with egg yolks before so it was a new experience. The results: creamy and delicious. The recipe I used to make the ice cream is from the blog Lottie + Doof. The only difference is that I added a dash of vanilla and used baking sugar rather than regular. baking sugar has finer granules. We enjoyed the ice cream with a fig and balsamic vinegar compote. yum.

xo, jen

Hello there!

Okay, it's been way too long since I've been here on the blog. So sorry about that :( Life got pretty hectic there, but the calm is coming. I hope. As much as I want to play catch up, the reality is that it seems impossible. As I get back into the swing of blogging, I will backtrack here and there to share some of the past happenings. So with that being said let's start with here and now. yay.
A few nights ago, the girls and I indulged in a little DineLA at Bar | Kitchen. it was sooo yummy. For dessert the majority of us had this peach crumble with creme fraiche ice cream. I'll say it again guys: CREME FRAICHE ICE CREAM! All of us loved it. I had never heard of creme fraiche ice cream. have you? 

So of course I've been Googling it and this weekend I'm making it. Woot, Woot! This morning I even started making my own creme fraiche. exciting. Hopefully the ice cream will be just as tasty as the one at Bar | Kitchen. Wish me luck and have a great weekend.

xo, jen

Loving :: Canon Selphy

This little Canon Selphy printer is awesome. After reading many reviews, this is the baby I decided to purchase. The printer is very user friendly and versatile. perfect for my Project Life project. The photos print beautifully and it's so compact that it actually lives on my desk. Another great thing is that it's not a budget breaker. Since I wanted the white printer, I ordered it through Staples during a sale ($79) with free shipping. Another nicety is the fact that you buy the film & paper as a package. There's no guessing as to how many prints you can get and it's film so no messy ink cartridges to deal with. The package I purchased prints 108 6x4 photos. The best price (around $35) I've found so far is through Amazon. Oh, and then there's the convenience of not having to leave my home to print photos or pick up photos. Love it! Have a great weekend. xo, jen

Stuck In My Head :: Last Request by Paulo Nutini

This song has been stuck in my head for a few days now. do you remember it? I'm not sure what the song is about or how the video ties into the song, but the rhythm is nice and smooth. His voice has that raspy, scratchy, whiny sound. Hope you enjoy it!

Paolo Nutini - Last Request (US version) from shmor on Vimeo.

xo, jen

Loving :: Project Life

What do you do with all the photos you take? For a while now, I've been wanting to do something more that just store my digital photos. and not just slap them in a boring, non-documented album. The thought of going to print photos and doing a traditional scrapbook was totally overwhelming. However, awhile ago I had read about something called Project Life. Have you heard of it? Well, it's a systematic way of documenting life. The process appeared streamlined and seemed simple enough with beautiful results. I decided to give it try it at some point.
So a few months ago, HSN had a special and I ordered a kit. exciting. I chose to start in June and guess what? I ACTUALLY STARTED! I'm already hooked. Here's a look at one of my first Project Life pages:

xo, jen

Blinged Out!

It's official, I'm totally blinged out! love it. A couple of weeks ago I ran my last half marathon and set a PR for myself. yay, 2hr 38min thanks to coach K. Crossing the finish line and getting my bling (medal) was exhilarating. Okay, it's true that I've said "this is my last" before, but this race really felt like the end. In a course of a year, I've run 3 half marathons and am pretty proud that I went from zero to three in just one year. It's been a journey that I've loved and hated all at the same time. When I first started running, I could barely do 5 minutes before needing to walk and now I can go for miles. What I love most about running is that I feel STRONG. so important for women. If you've ever thought about doing a race, give it a whirl. I highly recommend the Rock n Roll Marathon series. They are well organized, huge, have bands throughout the course, and spectators cheering you on. it makes the run just a little bit easier.   


xo, jen  

Made :: Ice Cream Sandwiches

Last weekend my darling hubby was supposed to tell me that we were in charge of bringing dessert to a BBQ, but he forgot...until like 12hrs. beforehand. yikes. Thank goodness for F & E aka Fresh & Easy!
I bought a vanilla bean ice cream and a nice chocolate chip cookie dough to make ice cream sandwiches. We baked, assembled, and wrapped them just before leaving. They looked rustic and delicious. However, I don't know if they were good because the actual BBQing took too long  & before we knew it, we had to leave...without dessert :( My thought though: the sandwiches were probably rock hard since they sat in the freezer for hours. bummer.

xo, jen

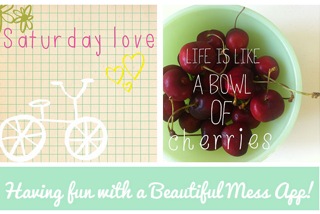
Loving :: A Beautiful Mess App

As some of you may know a few weeks ago the Beautiful Mess App was finally released. I was one of many excited about the launch. For some reason though, I waited until last week to buy it. The reviews have been mixed, but in my opinion it's a lot of fun! You can add fun borders, text, doodles, and filters to your iPhone pictures. Nothing fancy, just fun. true to a beautiful mess style. There are also add-ons (0.99) that you can purchase for a wider variety of options. After you're finished you can share your pictures via facebook, twitter, instagram or by e-mail. Even though I'm really enjoying the app,there are a couple of things that are a little bothersome. If you make an error or change your mind about something, you can't undo it, you have to start over (the girls do explain why this is on the app FAQ) and manipulating/resizing items can be a little tricky. not a deal breaker. The app itself is 0.99¢ and the add-ons are 0.99¢. I bought the app +1 add-on. That was $1.98 well spent! Here's a look at the first couple of pics I did:

xo, jen 

Made :: Lavender Simple Syrup

I’ve been wanting to make a flavored simple syrup for some time now and finally made it happen. The flavor of choice: lavender . yum. Of course this meant a trip to the local farmer’s market . The girl that sold me the lavender said it would be super easy to make. She was right. After surfing online and a couple of weeks of drying the lavender, I was ready to give it a whirl.
Great golly was it ever so easy. The taste: amazing! Seriously, it was much better than expected. So that same night, I mixed a little in my Cosmopoliton. The drink was good, but a little sweeter than I normally make. I also made Lavender Italian Sodas. YUM! YUM! I think it'll be nice in a tea or lemonade. Wanna make your own syrup? Here’s how I made it:
 Lavender Simple Syrup:
1c. of water
1c. of sugar
2 tbsp. of lavender buds (dried or fresh)
 
Combine the water, sugar, and lavender in saucepan over medium heat. Once the sugar is completely dissolved, turn heat down and allow the lavender buds to steep for 30min. or so. Pour the syrup into a clean glass container with a lid. Enjoy.


xo, jen

I Attended Alt for Everyone and all I got was...

1. A WEALTH OF INFORMATION! Here's a couple of nuggets from the classes I took:
Graphic Design 101, 201, 301 with the incredible Laurie Smithwick
A way to create tension is to avoid symmetry, shake things up
Be consistent with fonts you're using on the blog
Photostyling 101 with the brilliant William & Susan Brinson
Build a collection of props- find items at thrift, hardware stores, and dumpster diving (seriously)
Think about the things that I love or make me happy to help discover my aesthetic
Keynote-the Art of being a Goal Getter with the amazing Joy Cho
No is NOT the end of the world. Remember when one door shuts, another opens
Ask yourself, "Do I really want it?" Very important. If you do, don't wait around, go for it
Photoshop for Bloggers by the cute duo Mike & Alma Loveland
Standard DPI for web is 72 and 300 for print- really helpful
How to create a white background in my photos
How to Get Paid What Your Worth by the sassy Sara Urquhart
Have/ set a vision. If it's broad right now, narrow and tighten it up
Have a media kit and don't be afraid to use it!

2. NEW BLOGGER RELATIONSHIPS! Here's a few that are blossoming:
Kristine checkerberrylane / Marissa bourbonandgoose / Ryan thebloomingthread / Alyssa techlovedesign

3. A BOX FULL OF GOODIES! Here's me practicing something from the photoshop class:


the goodies in the box are: a mason jar full of cherry candies from Bing, fun case with goodies from Blue Q, beautiful necklace from Zelma Rose,  cupcake flags from Lingering Daydreams, note cards from Pixel impress, lip balm from Ivory +Ash, crayons from Childhoodlist. thank you.

Alt for Everyone was amazing! If you ever decide to go to any of the conferences they offer, I think you'll be well pleased. Have a great holiday weekend!

xo, jen

Specialty Coffee: The Pursuit of Deliciousness

Are you a coffee lover? Do you need your morning cup of joe to get your day started? Or do you simply enjoy the comfort of something nice and hot that gently awakens your spirit? For me it's the comfort and the rich, smooth taste. love a good dark roast. Here in LA, there are a lot of coffee shops that serve really good coffee! When we moved here one of the first coffee shops that a friend took me to was Lamill Coffee. It was amazing, almost life changing. I had no idea coffee could taste so good. Since then I've had coffee that has left me wanting more.
Earlier this week my husband shared this short YouTube video that highlights three specialty coffee companies, Lamill, Blue Bottle, and Handsome, and I absolutely loved it and wanted to share it with all of you coffee lovers.

xo, jen

Made :: Sauteed Chicken and Farmers Market Salad

Rarely does there seem to be a Saturday that I have time to go to one of me favorite farmer's market, but when I do, I want to buy everything. Fruit was my bounty this last trip. Most times I buy too much and it ends up going bad. This time I was determined to use everything before it spoiled. A salad with fruit was my answer. K made delicious sauteed chicken breast and I the salad. The meal was simple, quick, and delish. This would make an easy weeknight meal.


xo, jen

The salad is kale, quinoa, blueberries, strawberries, nectarine, blue cheese, and a homemade vinaigrette.

Made :: Calling Cards

Last week in preparation for the Alt for Everyone, I decided not only to make a small notebook, but to create a handmade calling card. Only a few though (literally I made four) since there really isn't anyone for me to give them to. Alt for Everyone is an online blogging conference. They were super quick to make and I'm happy with how they turned out.
The bottom half of the card is letterpress printed. I was practicing my printing skills a while back. The top half is written with a colored pencil and the heart with yellow glitter. Next, I cut them down on my handy dandy trimmer and rounded the corners. Easy breezy. Now if I only had someone to give them to :)


xo, jen